
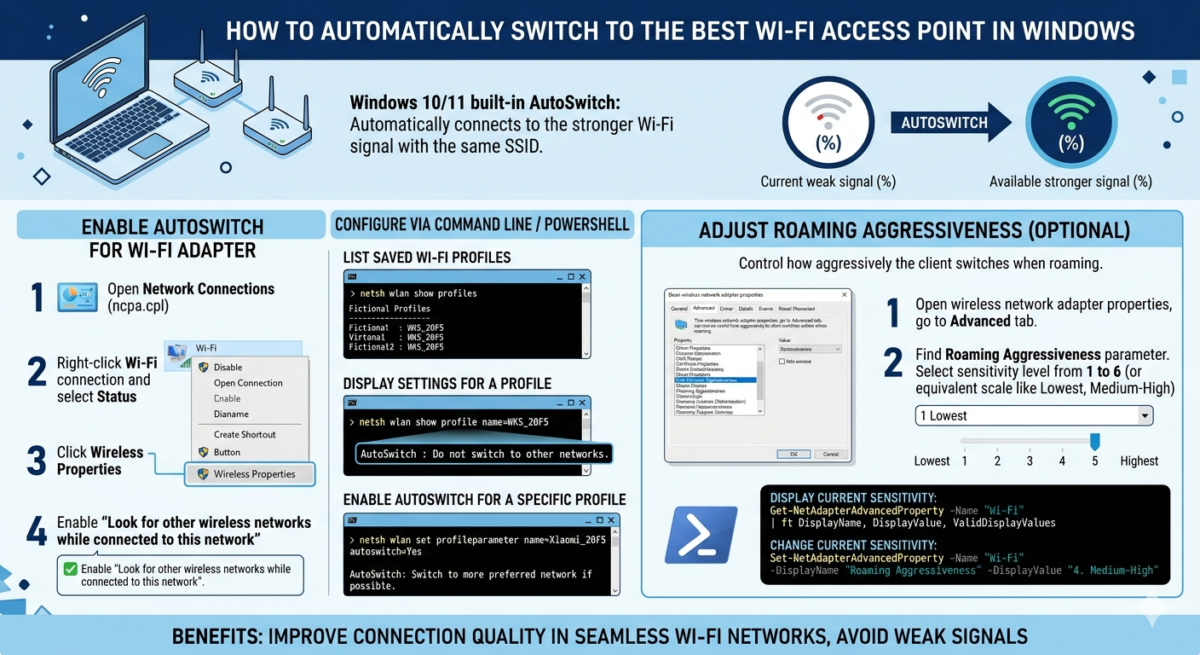
Windows 10 and 11 have a built-in feature that automatically switches to a Wi-Fi access point with the same SSID but the strongest available signal. This avoids situations where a Windows device continues to use a Wi-Fi network with a weak signal even though a stronger one is available.
The feature that automatically selects the wireless access point with the best signal in Windows is called AutoSwitch. To enable it for a WLAN adapter
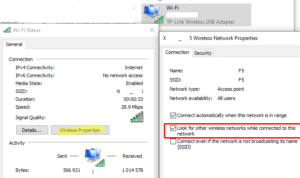
- Open the Network Connections control panel (
ncpa.cpl) - Click on the Wi-Fi connection and select Status
- Click the Wireless Properties button and enable the Look for other wireless networks while connected to this network option.
Once AutoSwitch is enabled for a network adapter, Windows will automatically switch to the network with the best signal strength.
The signal level (quality) of the current Wi-Fi network in % can be found using PowerShell:
(netsh wlan show interfaces) -Match '^\s+Signal' -Replace '^\s+Signal\s+:\s+',''
![]()
You can also enable or disable auto-switching for a specific WLAN profile from the command line using the command netsh wlan .
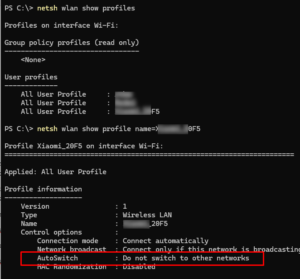
List saved Wi-Fi profiles in Windows :
netsh wlan show profiles
Display settings for a specific profile:
netsh wlan show profile name=WKS_20F5
In the Profile Information section, you can see that auto-switching is disabled:
AutoSwitch : Do not switch to other networks
To enable the AutoSwitch option for a specific network profile, run:
netsh wlan set profileparameter name=Xiaomi_20F5 autoswitch=Yes
This will change the settings to:
AutoSwitch: Switch to more preferred network if possibleIn the network adapter driver settings, you can configure how aggressively the client switches when roaming. This option is called roaming aggressiveness ( or roaming sensitivity ). Its availability depends on the network card model and the driver used.
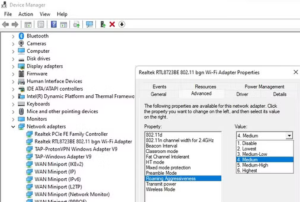
- Open the properties of your wireless network adapter and go to the Advanced tab.
- In the network adapter properties, find the Roaming Aggressiveness parameter (in our example, this is the Realtek network adapter)
- Select a sensitivity level from 1 to 6 in the drop-down menu (how aggressively the adapter should switch to a network with a better signal). At the highest sensitivity level, the device will continuously monitor the Wi-Fi network quality. If any deterioration occurs, it will attempt to find an access point with a better signal.
The current sensitivity level for Wi-Fi roaming of a WLAN adapter can be displayed using PowerShell:
Get-NetAdapterAdvancedProperty -Name "Wi-Fi" | ft DisplayName, DisplayValue, ValidDisplayValues
The command will display both the current Roaming Aggressiveness value and the allowed values.
Roaming Aggressiveness 1. Lowest {1. Lowest, 2. Medium-low, 3. Medium, 4. Medium-High...}If you need to change the current auto-switch sensitivity value, use the command:
Set-NetAdapterAdvancedProperty -Name "Wi-Fi" -DisplayName "Roaming Aggressiveness" -DisplayValue "4. Medium-High"
The auto-switching and roaming aggressiveness options discussed in Windows can improve the quality of user connections in seamless Wi-Fi networks.