Getting Started with Design: A Guide to Figma’s Basic Features
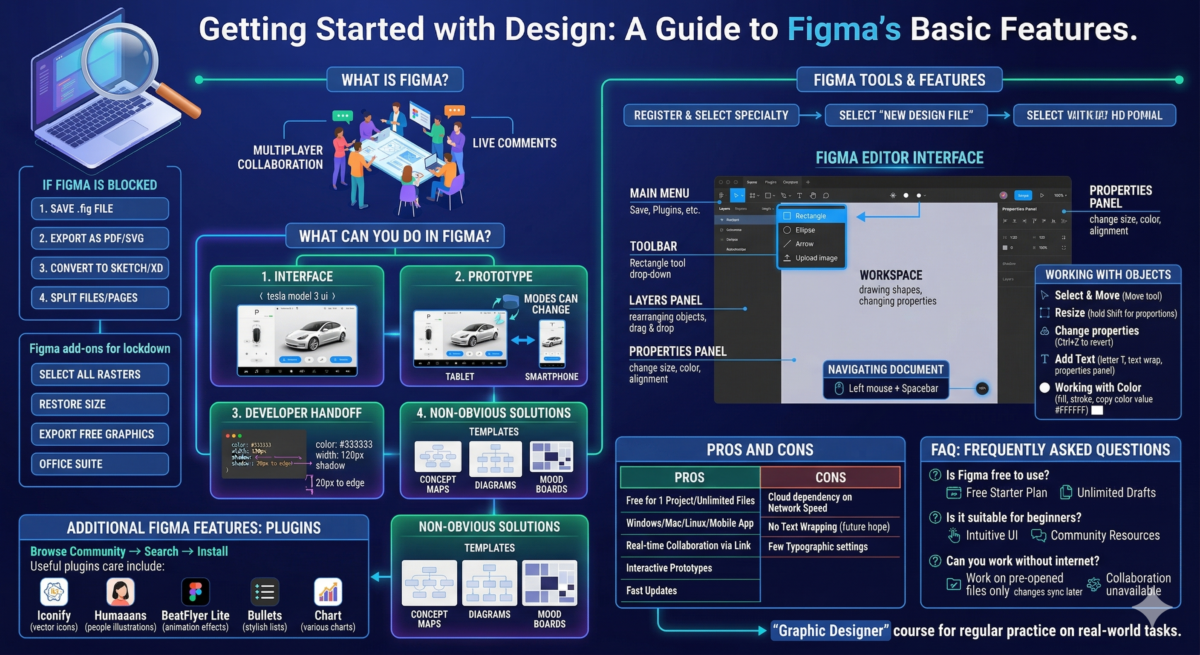
Table of Contents
What to do if Figma is blocked
Below is a list of steps to help you save your files and continue using them.
To open a file in your personal account, you need a local copy of it in .fig format.
If you’ve resized the raster illustration, it will be saved as a preview of the same size, losing the high resolution. How to fix this:
- Save the file as a PDF or SVG file. This is a safety net. In this format, text labels will appear as curves, components and styles will be lost, and curves will appear as arrowheads.
- Convert files to Sketch or XD. There are a few caveats here. Sketch is a paid program with multiple versions, while XD is an Adobe product, which may also be blocked.
However, if you convert files, keep in mind that the workspace in Figma is much larger than the workspaces in XD, Sketch, and Adobe Illustrator. Therefore, if you can reduce the size of the workboard layout, it’s worth doing so. You can also split the file into separate pages.
Figma add-ons and useful apps for lockdown
If you need to export raster images at their original size.
If you need to export to Sketch or XD. Paid and free conversions are limited to 10.
Free vector graphics program. Opens any SVG file.
Free program for raster illustrations and photo editing.
Free office suite. Opens text files, spreadsheets, and presentations.
What is Figma?
What is Figma used for?
What can you do in Figma?
Designers, marketers, product managers, and developers work in Figma. Let’s look at how to use Figma.
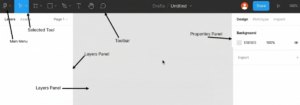
Interface
The interface is the product’s appearance: buttons, forms, icons. You can create them directly in Figma, and add effects: create animations for banners, make buttons clickable.
Tesla Model 3 interface in Figma
Prototype
A prototype is a model of a future app or website. It’s a simplified version of the product that already demonstrates how people will use it. A prototype can also be adapted for tablets and smartphones.
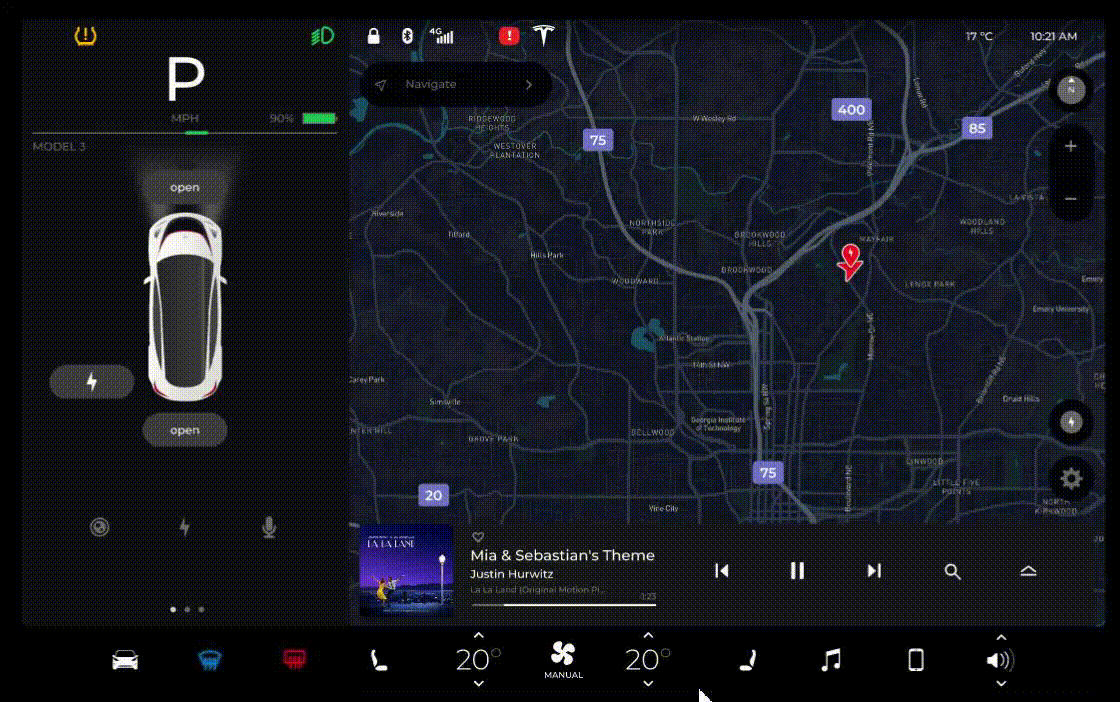
Figma example: Tesla Model 3 interface prototype: modes can be changed
Developer HandoffDeveloper Handoff is a solution that simplifies the work of developers: they can simply copy CSS styles instead of adjusting the height, width, and shadows of interface elements.
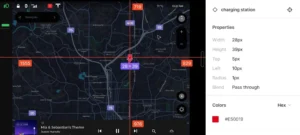
The label has dimensions, color, and distance to the edge of the screen.
Non-obvious solutionsFigma has a template library with which you can create:
- concept maps,
- relationship diagrams,
- advertisements,
- mood boards,
- diagrams.
Just copy them and use them at your discretion: save time.
Figma Tools and Features

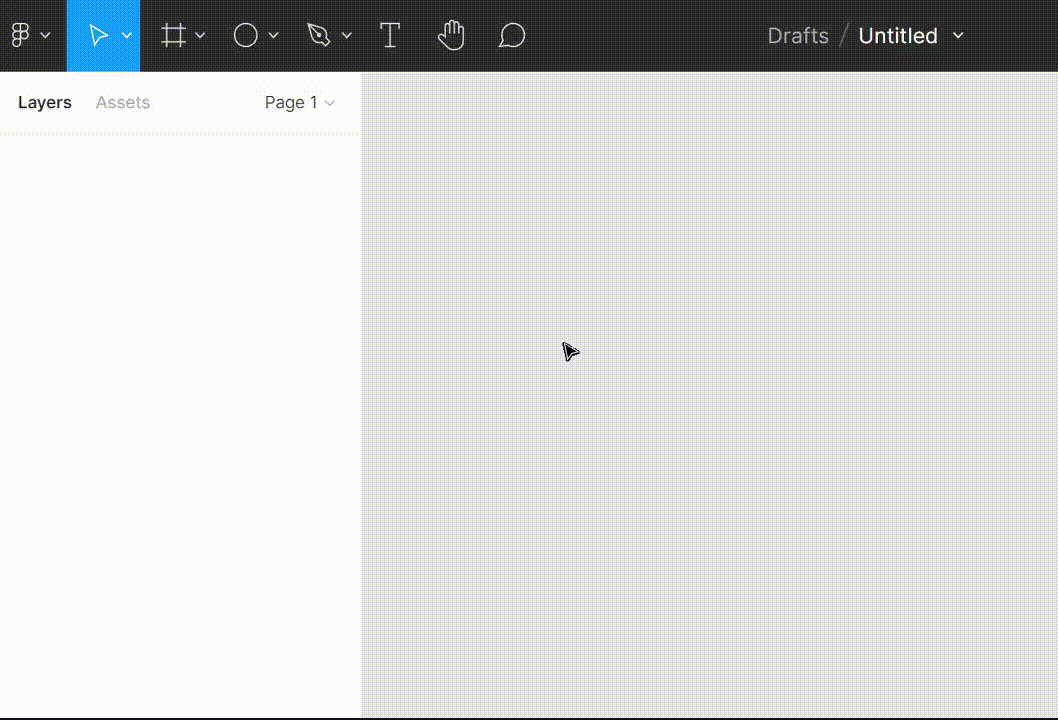
From the main menu, you can save and load files, delete selected objects, add plugins, components, and styles to the library, and much more.
The toolbar contains shapes and tools. When something is selected for work, it’s colored blue.
Some tools have a drop-down list. For example, where a square is drawn, a list of other shapes will appear, along with the option to upload your own image.
The workspace is used to draw shapes. This is where you select elements and then change their size, position, color, and alignment in the properties panel.
The layers panel contains a list of all objects. You can drag them freely to rearrange them.
Navigating within a document
The space visible on the screen is a small part of the working area.
To move to a space or view objects outside the computer screen, you need to simultaneously hold down the left mouse button and the space bar and move the cursor across the document in the desired direction.
The zoom level is indicated in the upper-right corner of the document. 100% is a 1:1 zoom level, while 50% is a 50% zoom level. To zoom in, press the “+” key, and to zoom out, press the “-” key. Alternatively, you can use Ctrl-click on Windows or Command-click on Mac. To quickly return the zoom level to 100%, press Shift + 0.
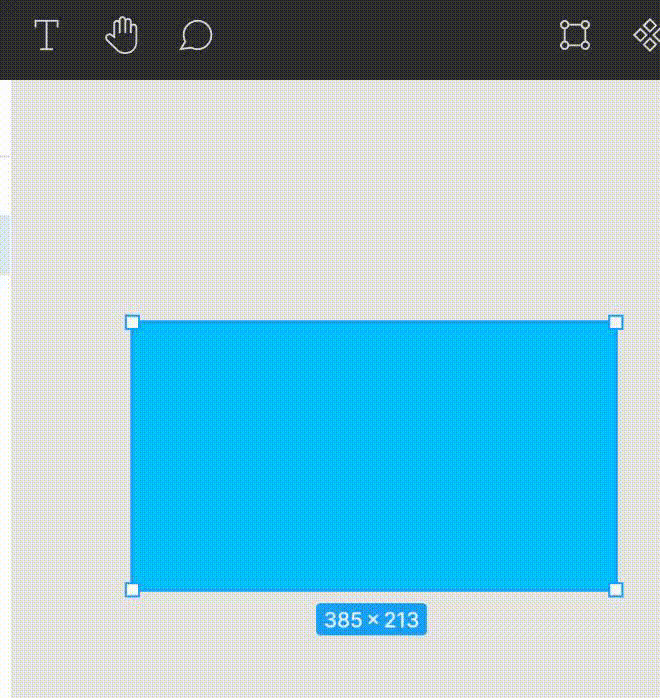
Figures
To draw a shape, use the Rectangle tool:
- Click on the icon of the appropriate figure.
- Hold down the left mouse button and select the starting point.
- Without releasing the mouse button, move the mouse in any direction until the shape reaches the desired size. Now you can release the mouse button.
Changing object propertiesTo understand how properties work, change them one by one. For example, you can rotate a rectangle, round its corners, resize it, or recolor it. If you change a property by mistake or need to revert to the original, you can use the Back shortcut: Ctrl + Z.
Selecting, moving, and resizingTo select, move, and resize, you need to select the Move tool (to the right of the main menu).
To select an object, click it in the workspace or select it in the Layers panel. To deselect it, click in an empty workspace.
When an object is selected, white squares are visible at its corners. Left-clicking on these squares will enlarge or shrink the shape.
If you only need to change the width or height, you can drag one of the sides of the shape.
To move a shape, hover over it, hold down the left mouse button, and drag the object to the desired location. To move the shape only vertically or horizontally, hold down Shift before dragging the object.
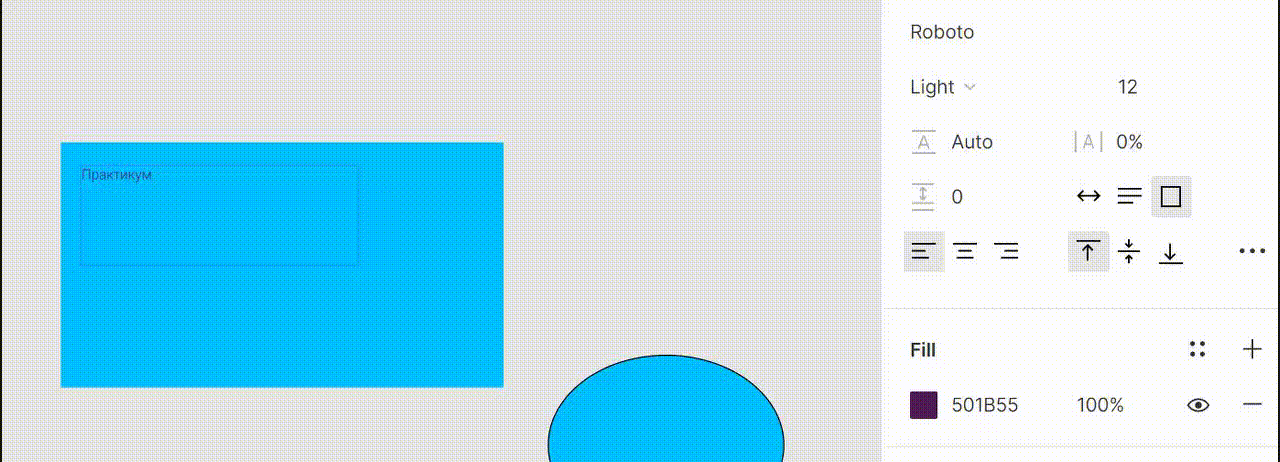
Working with color
Colors are highly customizable: you can choose hue, saturation, and opacity. If you need a specific hue, you don’t need to search for it in the palette. You can simply copy its exact value and use it.
To copy the color of a single object, select the object of the desired color, right-click on the color value field, and select “Copy.” Next, select the object you want to paint this color and paste the copied information into the color value field.

You can change the shape’s fill color and stroke color separately. Color opacity is adjusted next to the eye icon. The closer the value is to 100%, the brighter the color.
Text
To add text, select Text (the letter T) from the Figma toolbar. Next, create borders for the text. To do this, left-click and drag the borders, as if creating a shape. These borders indicate where the text will wrap to the next line and align with the borders. Now you can enter text.
Once the text is ready, you can change it in the properties panel – choose the font, color, and alignment.
Pros and cons of a graphic editor
ProsMany people are switching from Photoshop to Figma because it is more flexible and is constantly updated.
Other benefits of this program:
- Figma is free, and its features and tools are unlimited. However, the free version only allows one project to be opened. However, a project can contain any number of files.
- Figma runs on Windows, Mac, and Linux. It can be installed on a computer or accessed through a browser. There’s a smartphone app for both iOS and Android.
- Several people can work on a single project simultaneously. You can grant viewing-only or editing access. This feature eliminates the need to download layouts, prototypes, or illustrations: access is available via a link. Even if someone doesn’t have a Figma account, they can view the project.
- Some components allow you to change identical project elements with a single click, rather than changing each one individually. This means you can instantly change the color and font of buttons on all pages within a single project.
- The online editor lets you create interactive prototypes. For example, if you combine a project’s screen sets and click the order button, a contact form will open. The client doesn’t need to mentally visualize how the project will work: everything is clear in the prototype.
Cons of Figma
No project is without its downsides.
Additional Figma features
Figma plugins are used to make work easier, speed up work, or add new features.
To add a plugin, go to the menu and select “Plugins.” All plugins can be found in the “Browse Plugins in Community” section. This community is where users share plugins, icons, layouts, illustrations, and more.
Find the plugin you need using the search bar. To install it, click “Install.” After installation, restart Figma.
Here are some useful plugins:
- Iconify. Over 40,000 vector icons: Twitter Emoji, Material Design, Jam Icons, and more.
- Humaaans for Figma. Illustrations of people by Pablo Stanley. You can use ready-made characters or customize them.
- BeatFlyer Lite. Create animation effects in just a few clicks.
- Bullets. Stylish bulleted lists.
- Chart. Various charts.
To use Figma and other design tools professionally, guides alone aren’t enough—it requires more in-depth study and regular practice on real-world tasks. The “Graphic Designer” course will give you the knowledge and practical experience you need to become a designer.
FAQ: Frequently Asked Questions
- Is Figma free to use?
Yes, Figma has a free Starter plan with basic tools, template sets, and unlimited drafts. This is the perfect option to try out the graphic editor and complete your first project. This plan supports collaboration, allowing designers to quickly get used to working together on a task.

For beginner designers, the free plan is sufficient for completing educational and small pet projects. Source: Figma
- Is Figma suitable for beginners?
Figma has an intuitive and user-friendly interface: it’s easy to navigate, even for those new to similar graphic editors. Furthermore, the Figma Community and related communities offer a wealth of training materials, including in Russian, so if you’re looking to master the program at a basic level, you can do so in a few days. However, deeper learning will require more time and practice.
- Is it possible to work in Figma without the internet?
You can work in Figma without an internet connection if you open the necessary files in advance. However, in this case, changes will only sync when the connection is restored. Opening new files or loading plugins without internet access will not work. Collaboration will also be unavailable without an internet connection.
- What skills do you need to get started?
To get started with Figma, a beginner will need a basic understanding of composition, grid and typography skills, and the ability to work with layers, groups, and components. It’s important to understand how colors work together and maintain consistency in a project. Knowledge of importing assets and working with plugins will also be helpful.