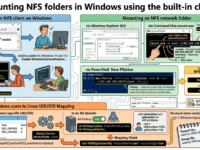
How to clear the WordPress cache
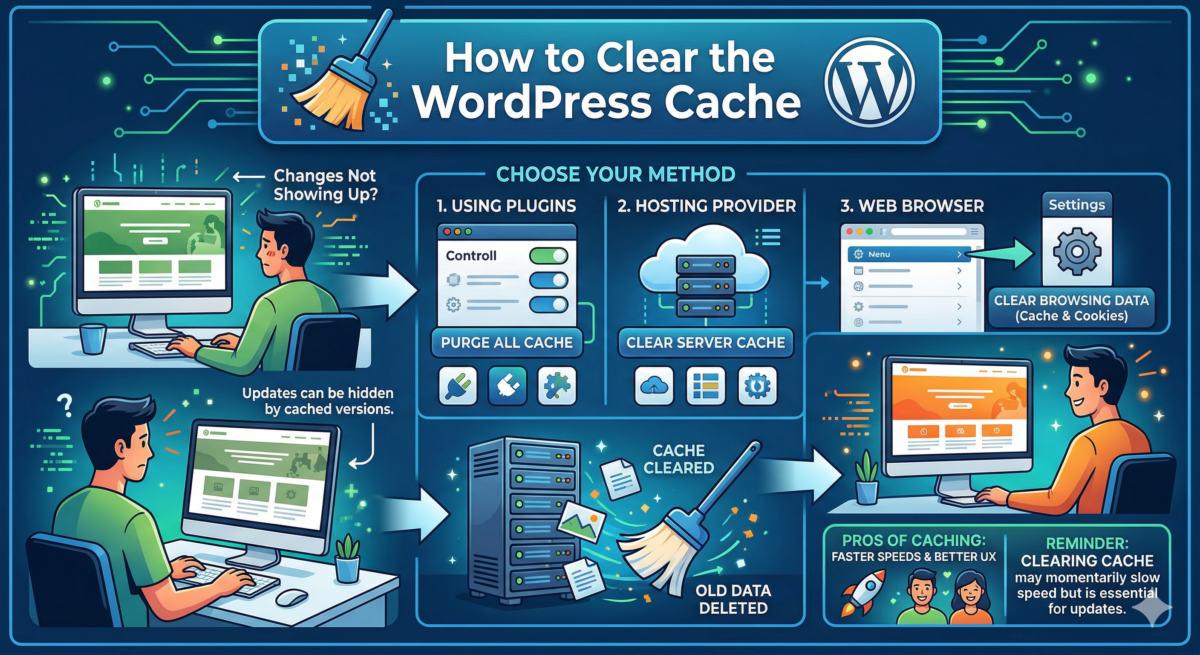
Table of Contents
- What is a cache? Plus, how is cached information stored?
- Why we use website caching and why you might need to clear your cache
- What does clearing the cache mean?
- How to Clear Cache in WordPress Using a Plugin
- How to clear cached files through your web hosting provider
- Additional tools for removing cache files
- Caching is vital to the success of your website.
You’ve made major updates to your site, but they’re not showing up in real time… What now? Before you panic, let us tell you that the solution is probably simple! You might just need to clear your WordPress and browser cache to see these new changes.
In this guide, you’ll learn what a cache is and why you might need to clear your WordPress cache. We’ll also cover several guides that will show you how to clear the cache in WordPress using plugins, how to clear cached information through your hosting provider, and how to clear browsing data from your web browser.
Spoiler alert: one of the best things you can do to improve WordPress website performance, besides ensuring proper security, is to enable caching. Knowing how to clear the cache when necessary will also help!
What is a cache? Plus, how is cached information stored?
Caching systems save and store a static version of your WordPress website. This process eliminates the need for WordPress to run heavy PHP scripts, allowing your web pages to load faster. This improves overall website speed and user experience, which also impacts SEO!
As a website owner, you have several options for storing a cached version of your WordPress site. Client-side caching, or browser caching, stores HTML pages on the user’s computer. This means that when the user visits your site, the cached version is loaded from their local computer.
Server-side caching stores static HTML pages on the website server’s hard drive or RAM. This method is typically used for highly secure websites with multiple databases.
Of the two options, browser caching is the fastest, although server-side caching is still preferable to no caching at all!
Why we use website caching and why you might need to clear your cache
The reason we use website caching is that it provides an optimal user experience for visitors. By serving a saved static copy of your website, your site can load much faster with each new visitor.
However, what’s the point of speeding up your website if you don’t have new content to display to your visitors?
People won’t visit your site if you don’t have something interesting or valuable to share. And they definitely won’t return to your site if you don’t continually update it with new content.
While caching should be cleared whenever something changes on your WordPress site, that’s not always the case. Sometimes you have to take matters into your own hands. Boom! #WordPress Click to tweet
When you make new changes to your website, they may not always be reflected in real time immediately – this is due to the cached version of your website that is stored.
This means that whenever you make design changes or publish new content… or make changes to plugins, themes, or your database, you may need to manually clear the cache to ensure visitors are using the most updated version of your WordPress site.
What does clearing the cache mean?
Clear, delete, and empty the cache are three different phrases used to explain the same concept. You’re deleting stored information from your WordPress site, including cached images, files, and pages, stored by your browser or server. This means that the next time you load your website, your browser will retrieve new information from the website’s server.
It’s important to understand that this means you’ll likely have to re-enter any saved logins associated with your WordPress account… so make sure you write them down somewhere safe!
After clearing your entire cache, you’ll likely notice a change in page load speed. (And we mean slower page speed, not faster.) Your page speed should return to normal after your caching solution caches the new version of your website, if it’s optimized.
How to Clear Cache in WordPress Using a Plugin
“How do I clear the cache in WordPress?” WordPress caching plugins are the easiest form of browser caching to implement. As a WordPress administrator, they are also the simplest caching solution, allowing you to clear your site’s cached data yourself—without the help of your website hosting service.
Below are step-by-step instructions on how to clear your WordPress cache using five of the most popular caching plugins.
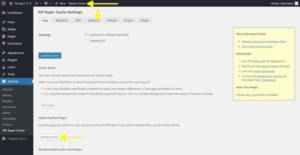
Clear your WordPress cache with the WP Super Cache plugin
WP Super Cache is one of the least complex plugins, meaning you’ll have less control over which cached data can be cleared. However, it’s very easy to do!
Click “Settings” > “WP Super Cache” in the menu bar on the left side of the screen. There are three places in the WP Super Cache settings where you can delete your cache: the “Simple” tab, the “Content” tab, or the admin dashboard.
Click the “Delete Cache” button, and the stored HTML pages will be cleared.
Clear your WordPress cache with the W3 Total Cache plugin
W3 Total Cache by BoldGrid is a popular and effective choice for caching your website’s information. They even promise to improve your website’s overall performance by 10x when fully configured.
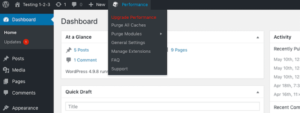
If you’re using the W3 Total Cache plugin, to clear your cache, go to the Performance menu and find the Settings for the plugin.
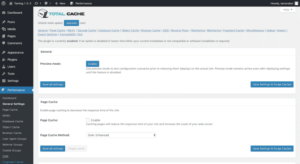
Scroll down the page and look at the individual caching settings. If this feature is enabled, you’ll be presented with two options for clearing the cache on your WordPress site:
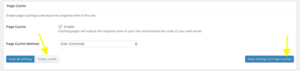
“Clear Cache” is used when the settings remain the same, but you want to clear the cached data for this specific option. “Save Settings and Clear Caches” allows you to save the new caching configuration and simultaneously clear the entire current cache.
Or, you can instantly delete all cached content and data from your website using the Performance menu in your admin dashboard:
Clear your WordPress cache with WP Fastest Cache
WP Fastest Cache is another plugin that’s easy to set up and use if you want to clear the cache on your WordPress site. In fact, it’s a favorite among many WordPress users due to its simplicity and user-friendliness.
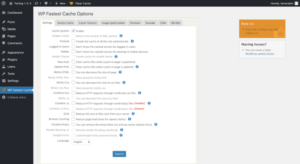
When using WP Fastest Cache, to clear the cache, go to the Delete Cache tab.
You have two options:
- Clear cached content.
- Remove cached content, as well as minified CSS and JavaScript files.

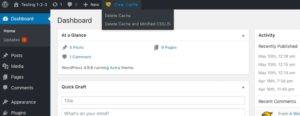
You can also do this anywhere in WordPress. Simply expand the “Clear Cache” menu in your admin dashboard, and you’ll see the following options:
Clear WordPress Cache with WP Rocket
Click “Settings” > “WP Rocket” in the menu bar on the left side of the screen. Once you’re in the “Dashboard” tab, click “Clear Cache.” You can also hover over the WP Rocket button in your WordPress admin panel and click “Clear Cache.”

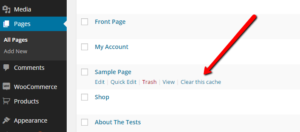
If you want to clear the cache of a specific blog post or website page, you can click the Pages or Posts buttons on the left menu bar, hover your mouse over the blog or page you want to target, and click the Clear This Cache link.
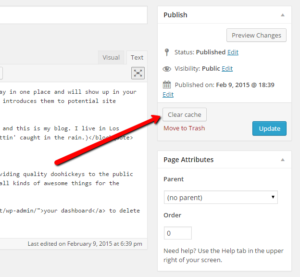
Or, on the post or page editor screen, in the editor pane, click the Clear Cache button just above the Move to Trash link in the Publish meta box.
Clear WordPress Cache with Hummingbird
The Hummingbird plugin from WPMU DEV allows you to compress files, use lazy loading, read website performance reports, cache your WordPress site, and much more. Powered by over 1 million websites worldwide, this world-class plugin offers a wealth of features to help optimize your site… and we highly recommend it!
Clearing your cache with the Hummingbird plugin is very easy. Just follow these instructions, starting from your WordPress dashboard: Hummingbird Pro > Caching > Clear Cache.
How to clear cached files through your web hosting provider
1. Clear all cache using Kinsta
When you use Kinsta, a premium WordPress hosting provider, it takes care of all your server-level caching needs. This includes full-page and object caching.
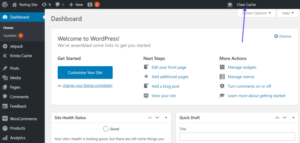
If you ever need to manually clear your cache while using Kinsta, it’s easy! Just go to your WordPress dashboard and find the “Clear Cache” button on the right. Click it… and voila!
2. Clear all cache using Nexcess.
Nexcess is a diverse company offering fully managed hosting for WordPress, WooCommerce, and Magento.
Of course, today we’re talking about WordPress. When you use Nexcess to host your WordPress site, they automatically take care of your page caching. If you ever need to clear the cache manually, they make it almost as easy as Kinsta.
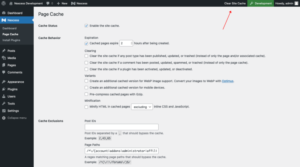
Click Nexcess > Page Cache in the sidebar. Then click the “Clear Site Cache” button on the admin toolbar.

All done! You’ve successfully cleared your website’s cache.
3. Clear all cache using SiteGround
SiteGround WordPress hosting provider offers two ways to clear the cache from its built-in caching solution: from the SiteGround hosting control panel or from the WordPress admin panel.
To clear the cache from your hosting control panel, go to the “Site Tools” section, go to the “Speed” tab > “Caching” > “Dynamic Cache,” and click the menu button next to the domain name of the website you want to clear the cache from. Then click “Clear Cache.”
Alternatively, you can install the SG Optimizer plugin. After installation, all you need to do is click “Clear SG Cache” in the admin panel (or top bar).
4. Clear all cache using WP Engine
WP Engine provides managed WordPress hosting and offers its own built-in caching system. In other words, no caching plugin is required.
You can manually clear the WP Engine cache by clicking WP Engine in the top bar (or admin panel) of your WordPress dashboard. Under “General Settings,” click the blue “Clear All Caches” button… and you’re done!
5. Clear all cache using BlueHost
BlueHost is one of the most popular hosting companies… and they make caching incredibly easy. Their hosting offers a built-in caching solution that helps improve your website’s optimization and performance.
To clear all cached pages and information with BlueHost, simply log into your WordPress dashboard (or admin area) and locate the “Caching” section in the admin toolbar (at the top of the page). When you hover over it, a “Clear All” option should appear. Select this option to clear all caches.
Additional tools for removing cache files
1. How to clear cache if you have a CDN
A content delivery network (CDN) provides an additional layer of caching for WordPress websites. Essentially, a CDN sends a cached copy of your website from one of its remote data centers to nearby website visitors. This not only benefits from fast delivery of cached content to visitors, but also reduces the physical distance between the server and them. (This makes your loading times incredibly fast!)
To clear the cache on your CDN, you’ll need to log in to the third-party CDN platform. Check out our frequently asked questions to learn how to clear your WordPress site’s CDN cache.
2. How to clear the cache on a reverse proxy server
A reverse HTTP proxy, such as Varnish or Nginx, is another type of caching you might want to clear.
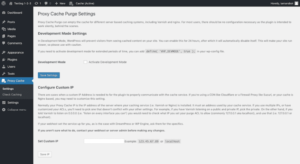
If this setting is enabled, you should install the Proxy Cache Purge plugin. There are several reasons for doing this:
First, if you want to prevent users of the site’s frontend from seeing updates you make to the site, you can do so in the settings by putting it into development mode:
This ensures that they only see cached content (pre-refresh) while you are working on the site.
You can also use this plugin if you want to know if caching is working properly:
Once you run the test, it will tell you if something like a plugin or theme is creating a conflict and preventing your website from clearing the cache properly.
To completely clear the reverse proxy cache using this plugin, use the menu on the admin toolbar:

3. How to clear the cache on the WordPress firewall
A WordPress firewall is technically a reverse proxy, as it inspects and filters traffic before it reaches your site. However, one key difference is that a proxy server is designed to improve website performance, while a firewall is designed to ensure security.
Not all firewall tools allow you to clear the WordPress cache. However, Sucuri Security and CloudFlare are two examples of WordPress firewall plugins that do allow you to clear the cache.
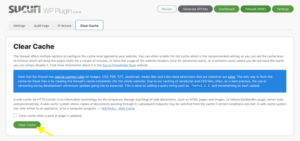
Clear WP Cache with Sucuri Security
If you’re using the WP Sucuri plugin, go to Sucuri > WAF in your WordPress admin menu. In the “Clear Cache” tab, click the “Clear Cache” button.
Clear WP Cache with CloudFlare
With CloudFlare, you can either clear all cached data or clear the cache for a specific URL. Once you’re logged in to CloudFlare, click the “Caching” button in the top menu bar.
If you want to clear everything CloudFlare stores, the next steps are simple. Click the blue “Clear All” button. A warning pop-up will appear. If you agree, click “Clear All” again.
To clear the cache for a specific page, select the blue “Custom Clear” button instead of the “Clear All” button. In the window that appears, select the URL in the Clear by field. Enter the corresponding URL in the text field, follow the instructions in the form, and click “Clear.”
Ideally, you should configure your firewall plugin to automatically clear the cache when content is updated. However, you can also use these methods to clear the cache manually if you don’t see updates on your site.
4. How to clear the cache using the WordPress command line
Wondering how to clear the WordPress cache without plugins? Using the WordPress command line may be one option. However, using the WordPress command line to clear the cache doesn’t delete the page cache, but the object cache, which stores database queries. Therefore, only try this method if you really want to clear the object cache.
To do this, run the following in the WordPress command line:
# Clear cache.
$ wp clear cache
Success: Cache cleared.
5. How to clear your browser cache
Right now, you’re probably only thinking about the cached version of your WordPress site, but remember that your browser also has a caching system that saves copies of every website you visit. This means that to see new changes to your website, you may also need to clear your browser’s cache.
Below are step-by-step instructions on how to clear browsing data in Safari, Google Chrome, and Firefox.
Safari Tutorial
Go to the Safari menu by clicking Safari in the upper-left corner of the screen (if you’re using a Mac). From the drop-down menu, select Preferences.
Go to the “Privacy” tab (with the hand icon). Next to “Cookies and Website Data,” select “Manage Website Data.” Click “Remove All.”
Google Chrome Tutorial
In the right corner of the screen, tap the three dots in a vertical line (“Settings”). From there, select “More tools,” then “Clear browsing data.”
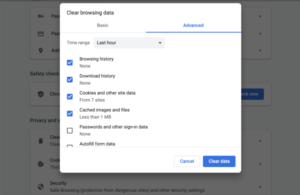
This is the easiest way to clear browsing data in Google Chrome, but you can also go to the three dots and select “Settings” from the drop-down menu. This will take you to a new page.
In the “Privacy and Security” section, click “Clear browsing data.” Select the “Advanced” tab. This will allow you to select specific data you want to clear from the cache instead of clearing all browsing data.
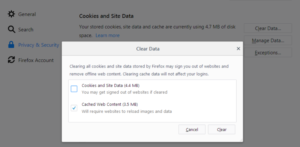
Firefox Tutorial
From the top menu bar, select Firefox > Options. On the new screen, click “Privacy & Security” in the left menu. Under “Cookies and Site Data,” click “Clear Data.” You can then clear cookies and site data along with cached web content—either one or the other.
Caching is vital to the success of your website.
Caching is an important part of keeping your website running smoothly. But there are times when you need to clear your WordPress cache, so updated content can be displayed to visitors.
The guide above details various ways to clear the cache on WordPress websites to ensure these updates display. But if you find you don’t have time to manage caching or other parts of your speed optimization strategy, contact WP Buffs and let them handle it for you.