

Automated backups without installing anything
Creating an automatic backup in Windows 11 often requires installing a third-party application. However, the system itself includes more than enough tools to set up a simple, reliable, and highly configurable backup system. The key is to combine Robocopy, which handles copying the files, with a BAT file, which groups the commands, and with some method of automatic execution so that everything works without you having to remember to do it every day.
In the following paragraphs, I’ll show you how to create a backup of one or more folders and save it to another disk, an external drive, or even a network location. I’ll also show you how to run this process automatically. This provides a very flexible solution, without relying on third-party software, and with considerable control over what is copied, when it’s copied, and how the process behaves.
Furthermore, this way of working has a clear advantage: you decide exactly what the backup does. You can copy only certain types of files, exclude large folders, create logs of what has been transferred, or set up an incremental backup that only adds new files ( Time Machine-style ) and updates any changes. Ultimately, the goal is for you to learn how to create automated backups without installing anything and with enough customization to adapt them to your specific needs.
Ultimately, you’ll have a fairly practical structure. On one hand, you’ll have one or more Robocopy commands. On the other, a BAT file that combines them. And then, a system to launch that BAT file automatically, either with the Task Scheduler or by placing it in the Windows Startup folder . It’s not the most visually appealing solution, but it’s one of the most useful if you like to be in control and not rely on additional apps.
How Robocopy Works
Robocopy is the built-in Windows tool designed to copy files and folders from one location to another with significantly more control than File Explorer. This command helps you make copies reliably and adapts to a wide variety of situations. It can be used to copy a folder of documents to another drive, replicate an entire file structure to a USB drive, or send files to a network server. As you can see, it’s quite powerful.
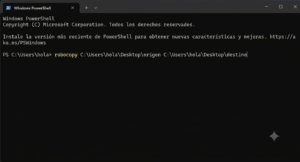
The basic syntax is very simple. You always start with a source folder and a destination folder. The basic command is this:
robocopy C:\origen D:\destino
From there, you add modifiers to decide whether to include subfolders, whether to copy empty directories, whether to generate a log, or whether to limit duplication to certain files. For a basic backup, it’s normal to use fairly straightforward commands and then refine them gradually.
If you’re considering automated backups, there are several parameters worth understanding:
- /E copies the entire folder tree, including empty directories.
- /S does something similar to /E, but omits empty folders.
- /Z allows you to resume an interrupted copy, which is very useful if you work with external disks or network paths.
- /LOG stores a history of the process.
- /XO prevents overwriting with older files, which is quite useful in simple incremental backups.
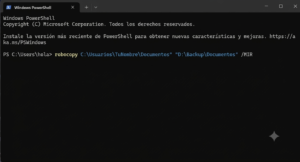
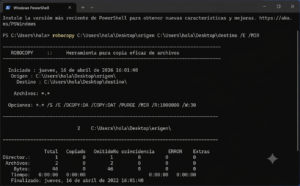
It’s also worth taking a moment to look at /MIR , which you can see in the image above. This parameter is incredibly useful for backups. It creates a mirror copy, meaning it makes the destination exactly the same as the source. Of course, there’s something to keep in mind: if you delete something from the source, it will also disappear from the destination in the next backup. Therefore, for many users, a basic incremental backup with /E and some exclusion options is often a more prudent approach than a full mirror.
In fact, if you’re looking for an incremental copy, the most sensible approach is to use Robocopy to copy only new or modified files , leaving existing files intact at the destination. In practice, Robocopy already works this way in many cases, comparing the source and destination before copying. To reinforce this behavior, you can use parameters like /XO , which excludes older files, and avoid destructive options like /MIR or /PURGE if you don’t need full synchronization.
To help you build your Robocopy commands more easily, here’s a table with some very useful practical examples :
| Use | Command |
|---|---|
| Basic copy of a folder | robocopy “C:\Documents” “D:\Backup\Documents” /E |
| Copy to network disk | robocopy “C:\Photos” “\\Server\Photos” /E /Z |
| Copy PDFs only | robocopy “C:\Invoices” “D:\Backup\Invoices” *.pdf /E |
| Recorded copy | robocopy “C:\Work” “E:\Backup” /E /LOG:”C:\Logs\work.txt” |
| Simple incremental copy | robocopy “C:\Source” “D:\Destination” /E /XO |
| Mirror copy | robocopy “C:\Source” “D:\Destination” /MIR |
And this other table summarizes some of the most important parameters for setting up backups:
| Parameter | What are you doing |
|---|---|
| /AND | Copy subfolders, including empty ones. |
| /S | Copy subfolders, but don’t empty them. |
| /Z | Allows you to resume an interrupted copy. |
| /XO | Excludes files older than those of the destination. |
| /XF | Excludes specific files or by extension. |
| /XD | Excludes specific folders. |
| /LOG:path | Save a log file of the copy. |
| /R:n | Indicates how many retries it will make if there is an error. |
| /W:n | Marks the waiting time between retries. |
| /MIR | It creates an exact mirror image of the origin in the destination. |
With all this in mind, the key takeaway is that Robocopy can handle everything from very basic backups to quite advanced systems. And since it runs via commands, it fits perfectly within a BAT file, which is exactly what we need to automate the process without installing anything.
How to create a BAT file to automate backups
Once you’ve decided which Robocopy commands you’re going to use, the next step is to put them into a BAT file . A BAT file is simply a text file with instructions that Windows can execute sequentially. That’s precisely its great advantage here: you can put as many copies as you want into a single BAT file . For example, one for Documents, another for Photos, and another for a working folder.
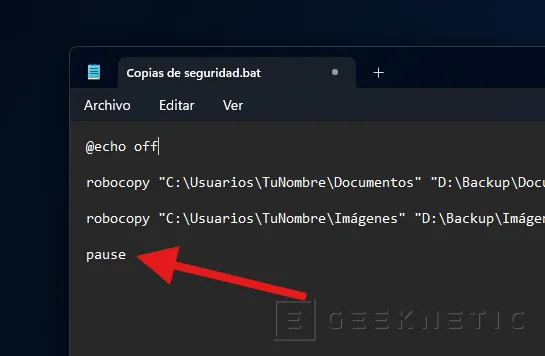
The process is very simple. Open Notepad and paste the commands you want to execute. For example, something like this:
robocopy "C:\Usuarios\TuNombre\Documentos" "D:\Backup\Documentos" /E /XO /Z /R:2 /W:5 /LOG:"C:\Logs\documentos.txt">
robocopy "C:\Usuarios\TuNombre\Imágenes" "D:\Backup\Imágenes" /E /XO /Z /R:2 /W:5 /LOG:"C:\Logs\imagenes.txt"
Next, save the file with any name you like, but make sure it ends with .bat . For example, backup-personal.bat . Very important: when saving, change the file type to All Files so Notepad doesn’t convert it to a simple TXT file.
If you then double-click on that BAT file, Windows will execute all the lines you’ve added, one after the other. This allows you to set up a fairly decent system without too much hassle. You can even add an opening line like `@echo off` to make the window cleaner . It’s also possible to add the `pause` command at the end if you want the command prompt to remain open afterward so you can review any messages. That’s up to you, but it’s advisable to do this the first few times to verify that the commands are working correctly.
The great thing about this idea is that you’re not limited to a single copy . You can automate multiple folders, multiple drives, or even multiple network destinations in a single file. And since everything is in plain text, modifying it later is incredibly easy. Simply open the BAT file with Notepad, change paths or parameters, and save it again.
How to automate backups
With the BAT file created, all that’s left is to decide when you want it to run . Here are two convenient methods, fully integrated into Windows 11. One is more powerful and flexible, and the other is simpler. The choice depends on whether you want complete control or a quick and easy solution.
Use the Task Scheduler
Task Scheduler is the best option if you want your backup to run professionally. You can schedule the BAT file to run at login, when your computer starts, every few hours, or at a specific time of day. To open this tool, search for Task Scheduler in the Start menu.
Once inside, create a basic task and follow the wizard. Choose a recognizable name and select your preferred trigger.
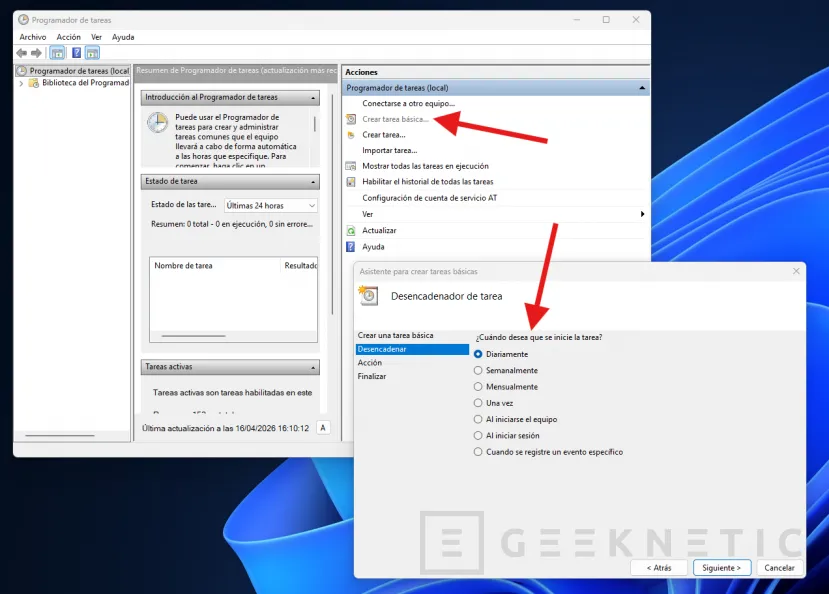
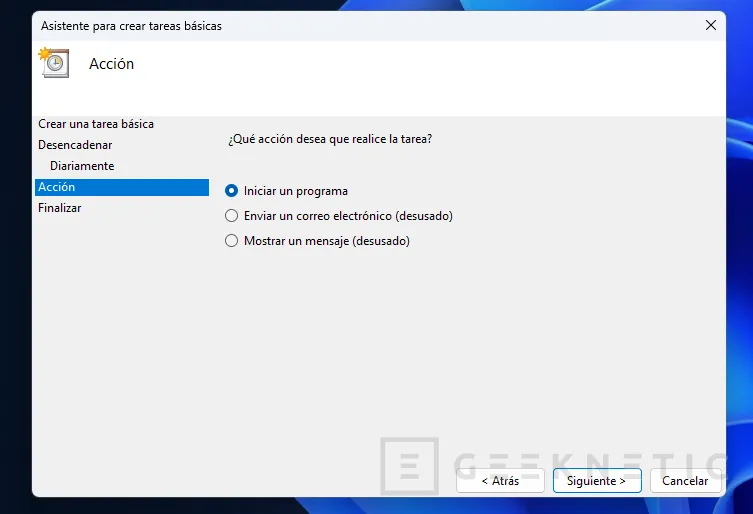
When the wizard asks you what action to take, select Start a program . You will then need to specify the path to your BAT file or select it using the Browse button . That will be enough for Windows to launch it automatically at the frequency you have configured.
This method is the most recommended because it gives you much more control . You can even have the task run with elevated privileges or only launch if a specific external drive is connected. If you want a truly automated and well-tuned solution, this is where it’s most worthwhile to invest a little time.
Place the BAT file in the Startup folder
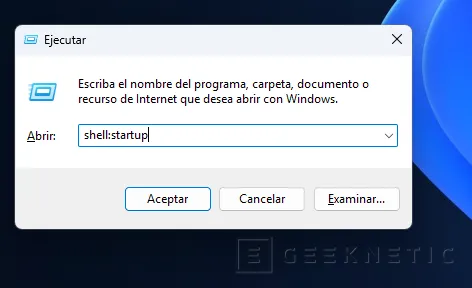
The other option is to place the BAT file in the Windows Startup folder so it runs every time you turn on your computer or log in. It’s a simple method. Just open the Run dialog box using the keyboard shortcut Windows key + R , type shell:startup , and press Enter . This will open your user’s Startup folder.
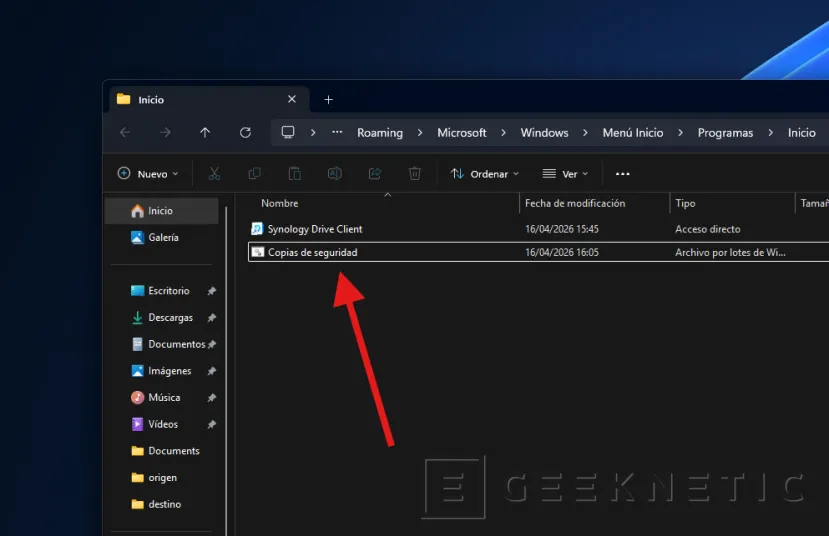
Next, copy your BAT file there or create a shortcut within that folder. From then on, Windows will launch it automatically at login. It’s a very convenient solution, especially if you’re looking for something quick and don’t want to mess with Task Scheduler.
However, two points need to be clarified regarding this method:
- First, if the backup task is very large, Windows startup will be affected . The computer will always run the backup at startup, which can make it take longer to be ready for normal use. Therefore, this method is convenient, but I only recommend it if the backup is relatively small or if you don’t mind waiting a little longer after turning on your PC.
- Second, if you prefer to keep a copy of your BAT file , I recommend sending a copy to the Start menu and saving the original in a secure folder. Alternatively, you can create a shortcut to the batch file in the Start menu, while keeping the original in your preferred directory.
In any case, what’s really interesting is that with either of these two methods you can set up an automated backup system, without apps and highly configurable . Once you’ve set it up, Windows will do the rest for you.